
Azure · Custos · Máquinas Virtuais
Azure Savings Scheduled Shutdown and Startup of Virtual Machines
Today’s post will cover Scheduled Shutdown and Startup of Virtual Machines and is part of the Azure Savings series that covers ways to save money on Azure.
I once heard, and have used ever since, the analogy that using cloud resources is like using electricity: the more you use, the more expensive it will be. However, you can also save money if you apply to the cloud what you currently do for electricity.
Turn off things that are not in use!
How Virtual Machines are billed?
First of all, Virtual Machines are compute resources, and these are billed per hour; however, this does not mean that if you run a VM for 59 minutes you won’t be charged because you didn’t reach a full hour.
In fact, Azure charges you by the number of full minutes, so to estimate prices for VMs, they’re presented per hour, or as 60 minutes in total if you prefer.
But what does it mean by full minutes? Well, if you run your VM for 1 hour, 30 minutes and 45 seconds, the total of full minutes is 90 minutes, so Azure will calculate the charge accordingly.
Some math for better understanding
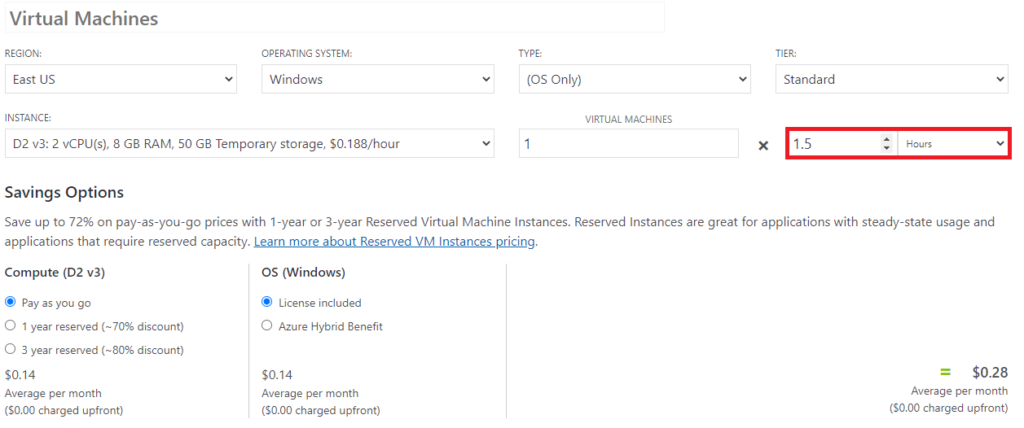
Let’s take the following VM size: D2 v3 (2 vCPUs, 8GB RAM) which is advertised as US$0.19/hour
Dividing 0.19 by 60 gives us the cost per minute, which is 0.00316. Since we ran for 90 minutes, let’s calculate 0.19 + (0.00316 * 30 minutes)
US$0.28 for 90 minutes
If you access the Azure Calculator, you can double-check the price match when you change the field in front of Hours to 1.5, which is the same as 90 minutes
How a VM price is composed?
In a cloud environment, you don’t need to think about electricity, air conditioning, or a physical room to maintain the servers, but that doesn’t mean you aren’t paying for them—these costs are embedded into the VM’s price, along with Disks, Licensing, and Storage Transactions.
By going to the Azure Calculator, you can get a basic idea of how much a VM would cost
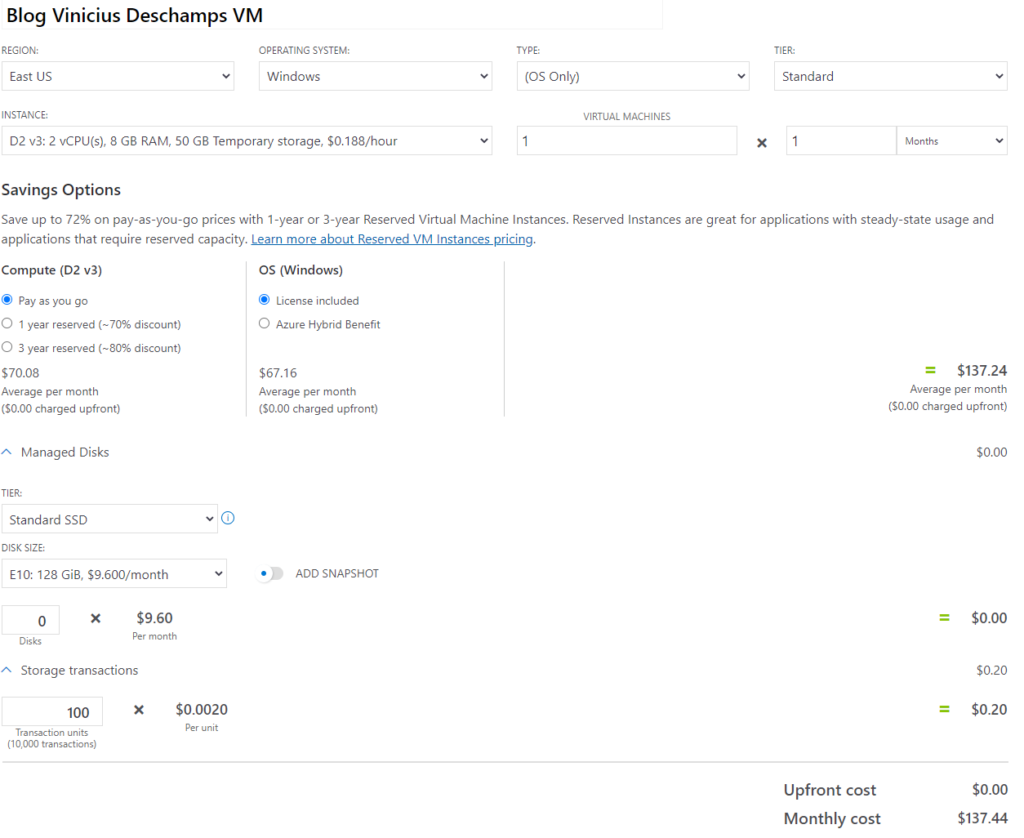
Each option can affect the final price, whether by changing the region or by adding an additional disk. Also, this is an estimate of the price for 1 month of usage of a D2 v3 VM in Azure, US$137.44.
Why should I schedule a stop / start of a VM?
To save money! Imagine a scenario where you have a VM that is used during business hours by a specific person—why keep the resource up and running 24×7 if it isn’t required?
But before showing how to schedule a stop / start, I’d like to highlight a couple of things:
Stopped vs Deallocated
A VM can either be stopped or stopped (deallocated), and the difference is whether you are charged for the compute resource or not.
To avoid billing for your compute resources, the VM must be in a Deallocated state.
Avoiding surprises
Even though you are not using compute resources by deallocating the VM, there are related items that you continue to be billed for, such as the Operating System disk.
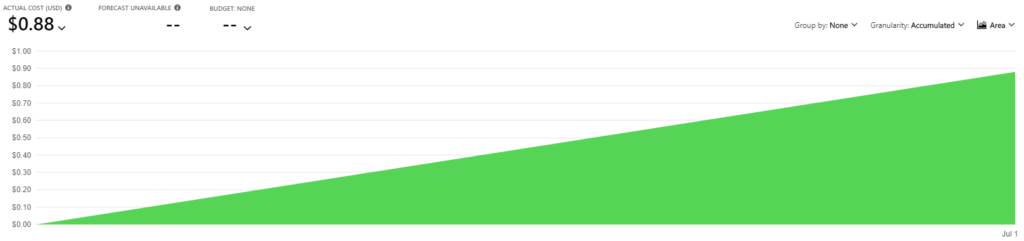
Here is the cost from my Deallocated VM in a single day, about US$0.88/day (~US$26.4/month)
Dynamic Public IP vs Static Public IP
By default an Azure Virtual Machine is configured with a Dynamic Public IP, and it remains tied to the VM until it is restarted, stopped, or deallocated.
Also, a Static Public IP incurs costs when a VM is deallocated.
How to schedule shutdown / startup of a VM?
Schedule Shutdown
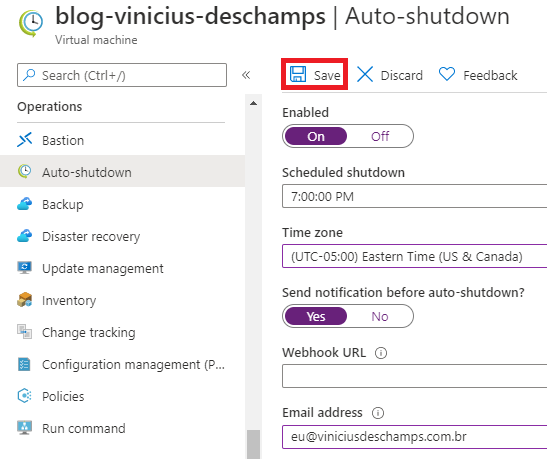
Go to your Virtual Machine, and under Operations look for Auto-shutdown, and click on it
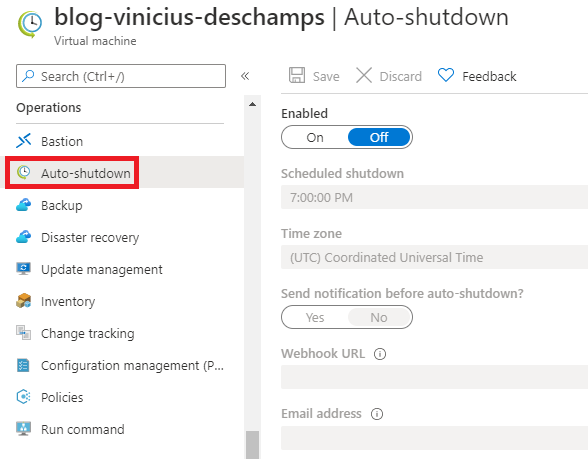
Change the Enabled from Off to On, to be able to modify the options: scheduled shutdown, time zone and send notifications before auto-shutdown?
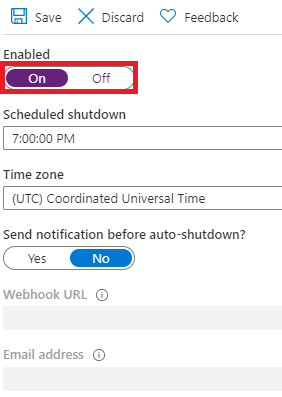
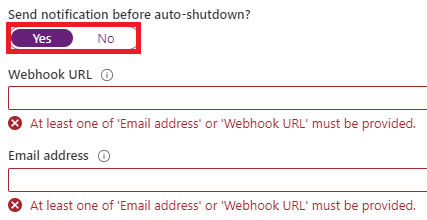
You have the option to send a notification before auto-shutdown by selecting Yes and filling in one of the choices Webhook URL or Email address
Once you choose how the Auto-shutdown fits better for your activity, hit Save
Schedule Startup
To schedule the start action, you need to have an Automation Account and work with Runbooks to make it happen.
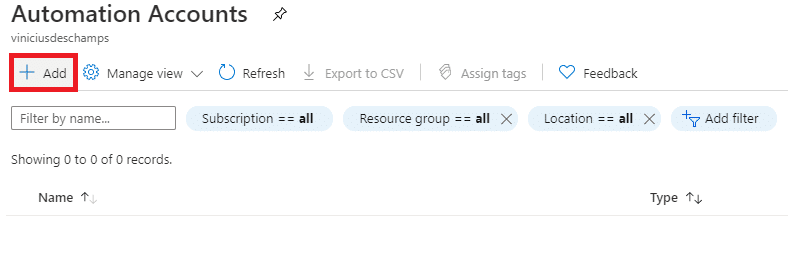
In the Azure Portal, use the Search field (1) at the top of the portal and type automation, then click Automation Accounts

In Automation Accounts, press Add
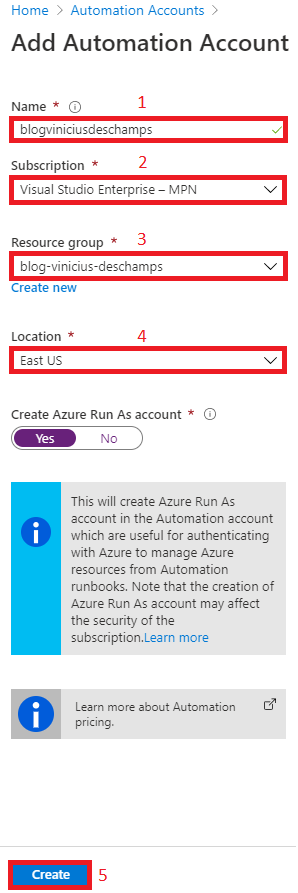
Fill the form at Add Automation Account providing Name (1), Subscription (2), Resource Group (3) and Location (4), then press Ok (5)
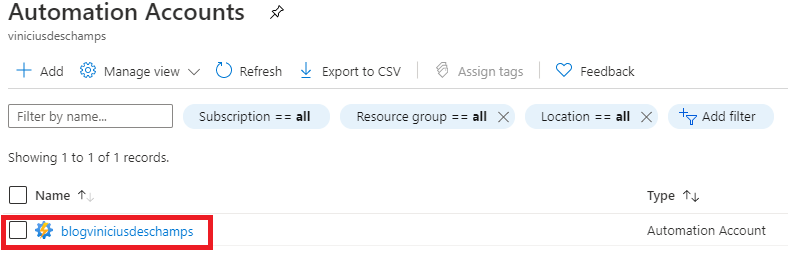
Once we have the Automation Account created, let’s click on it to continue the configuration
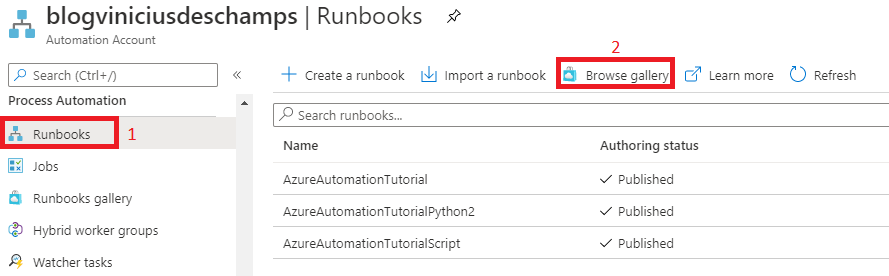
Then under Process Automation, look for Runbooks (1) and Browse gallery (2)
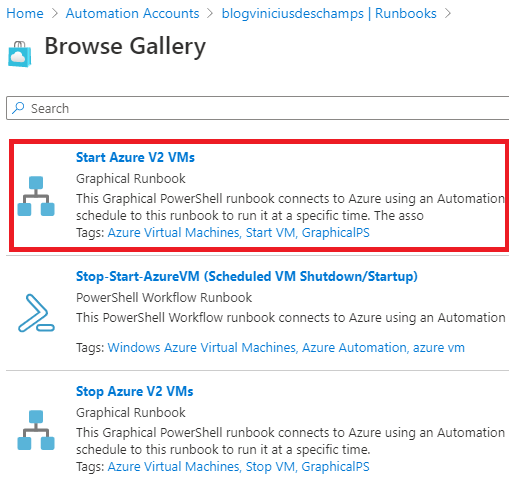
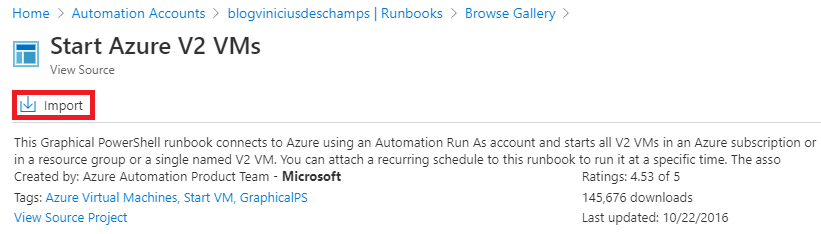
You can search for runbooks that would address your needs, but at this time we want to Start a VM, and it is the first option, let’s click on it Start Azure V2 VMs
Then click Import
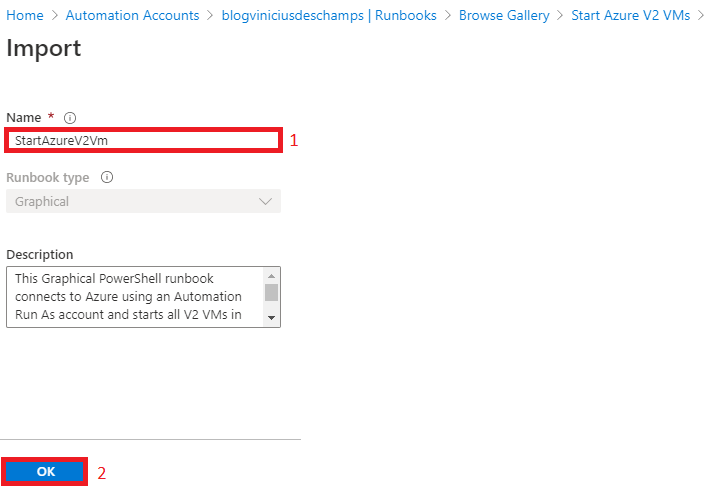
Fill in the Name (1) and press OK (2)
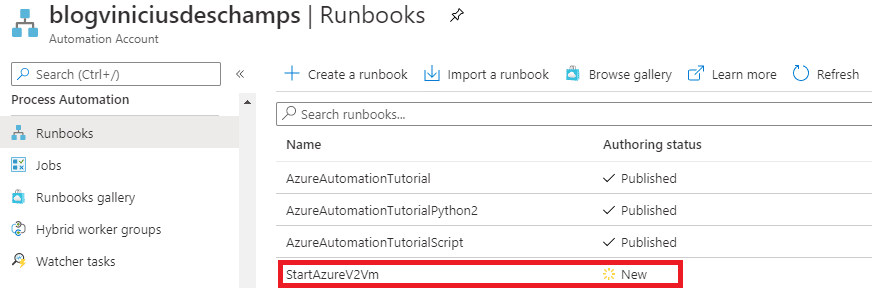
Back to the Runbooks, you should now see a new Runbook named StartAzureV2VM, click on it
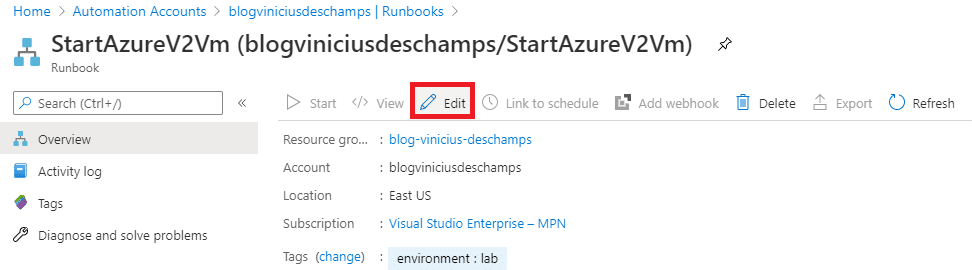
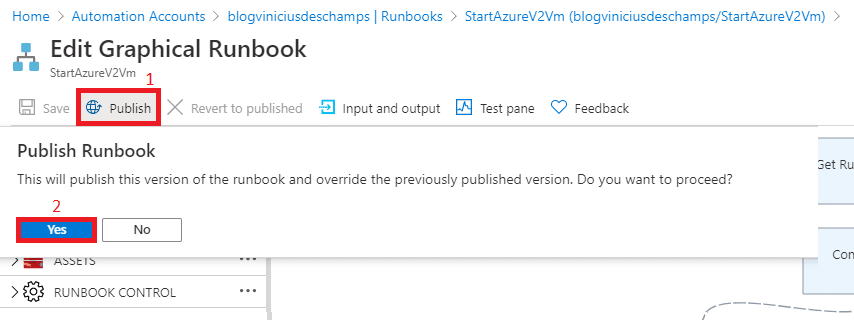
Click Edit
And then Publish (1), and click Yes (2)
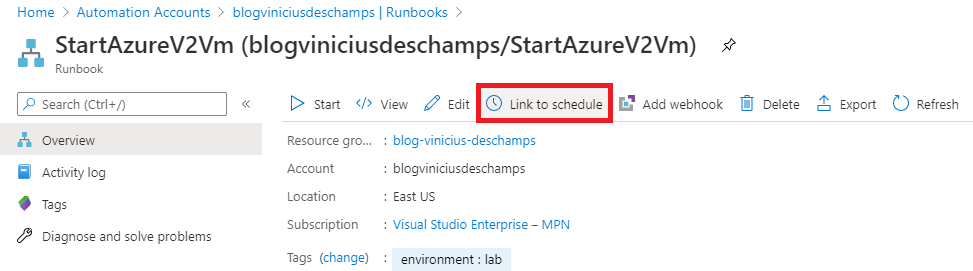
Now, let’s create a schedule by clicking Link to schedule
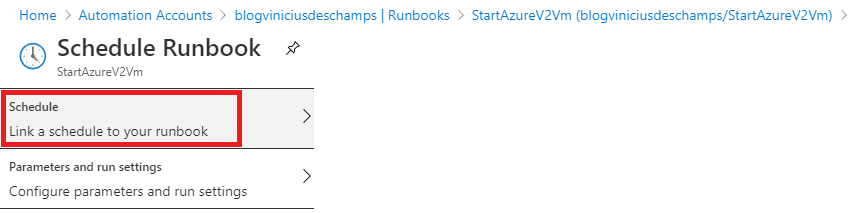
Click Link a schedule to your runbook
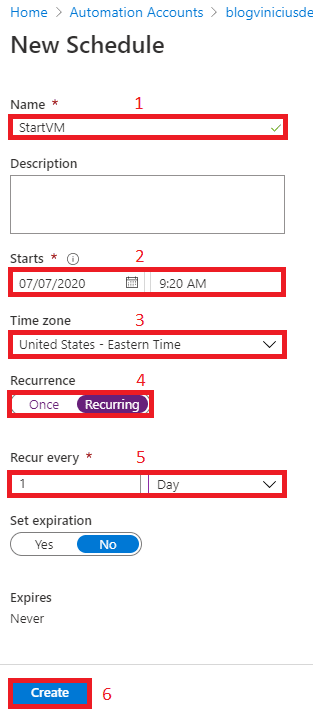
And Create a new schedule

Fill the information Name (1), Starts (2), Time zone (3), Recurrence (4), Recur every (5) and press Create (6)
Now we have the schedule set, let’s Configure parameters and run settings
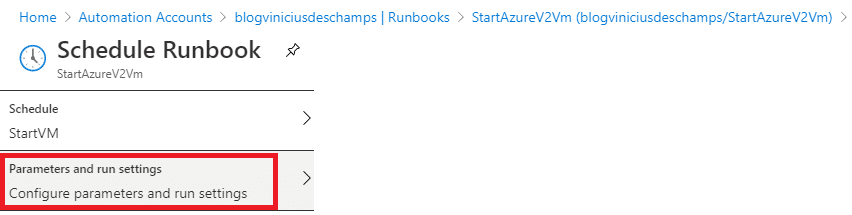
Provide the following information according to the Virtual Machine you want to start, and provide ResourceGroupName (1) and VMNAME (2), then press OK (3)
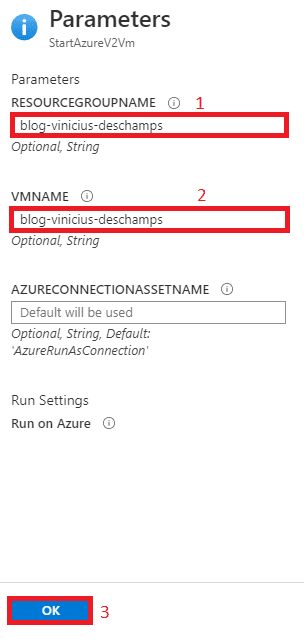
All set, click OK to create the schedule
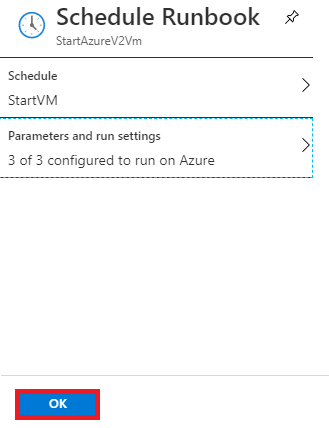
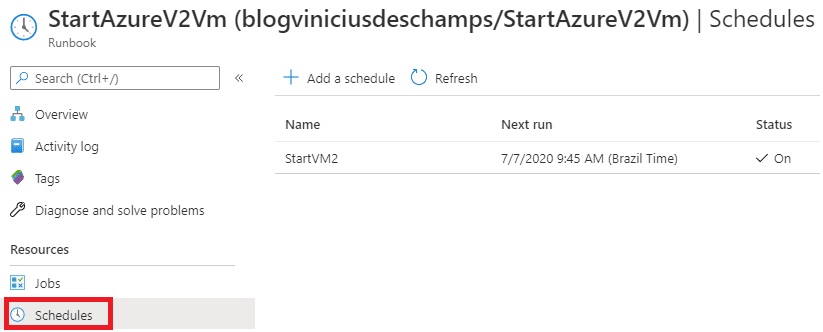
In the Runbook, under Resources find Schedules and click on it; you will see a schedule and notice when the Next Run will be
And that’s it!
I hope you liked it, and I’ll see you in my next post.
Photo by Sharon McCutcheon on Unsplash