
Azure · Bastion · Máquinas Virtuais · Security
Grant access to Virtual Machine using Azure Bastion
In today’s post, I am going to show you how to grant access to a Virtual Machine using Azure Bastion.
Azure Bastion highlights
As you probably saw in my Improve Security with Azure Bastion post, Azure Bastion is a PaaS service that provides secure RDP and SSH connectivity to shield your Azure Virtual Machines.
That said, your virtual machines are no longer exposed through the Internet when Azure Bastion is in place; therefore, access to them is made directly via the Azure Portal.
Access Control (IAM)
While you aim to improve security, using Azure Bastion, you don’t want to leave the Azure Portal access to the VM overly open for the users who need access, right?
To accomplish that, you should use Access Control (IAM), which is used to provide granular access to Azure Resources, and it is possible to cover Azure Bastion’s specific requirements as well.
Azure Bastion permissions
The permissions Azure Bastion requires at minimum are the following Reader roles
- On the Virtual Machine
- At NIC with private IP of the Virtual Machine
- The Azure Bastion resource
How to Grant Access to VM using Azure Bastion
Virtual Machine
On the Virtual Machines page, select the VM you configured Azure Bastion for, click on it (1), choose Access control (IAM) (2), click Add (3) and Add role assignment (4)

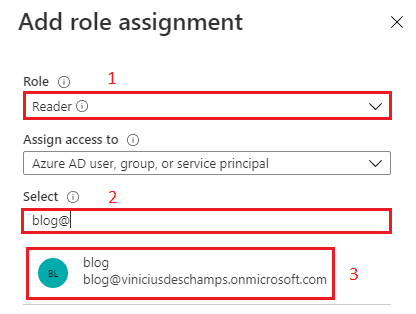
You will see the following blade opened in your window, Add role assignment. Please fill accordingly: Role (1) choose Reader, type the name of the user you want to grant access in Select (2) field, and select it (3)
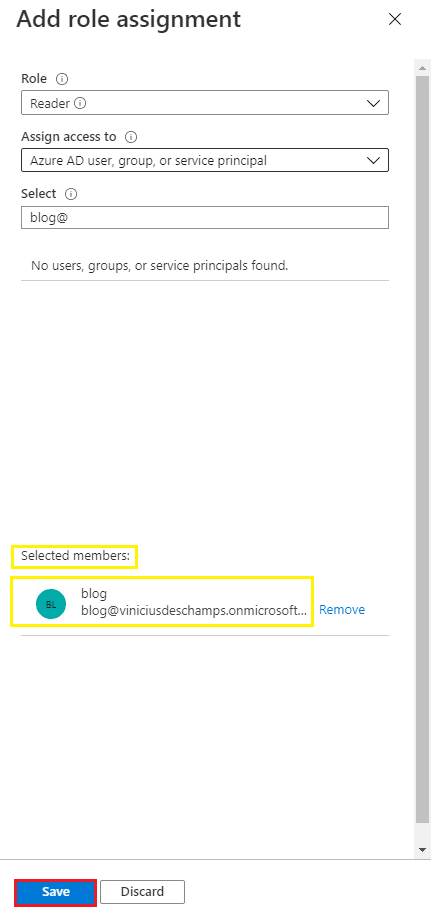
Once you select it, verify that Selected members shows the expected users and click Save
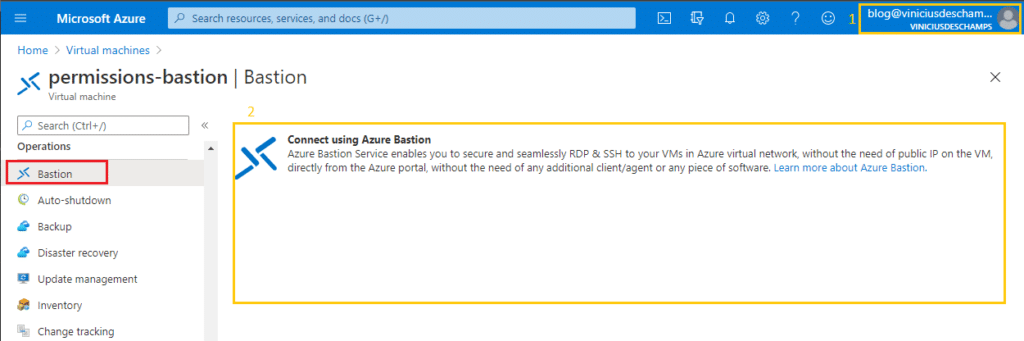
As a side note, if you try to connect the user and have them use Azure Bastion right after the user is granted Reader Role on the Virtual Machine, this is how they will see the screen—no errors, nothing wrong, but there is nothing to connect to or provide credentials
NIC with private IP of the Virtual Machine
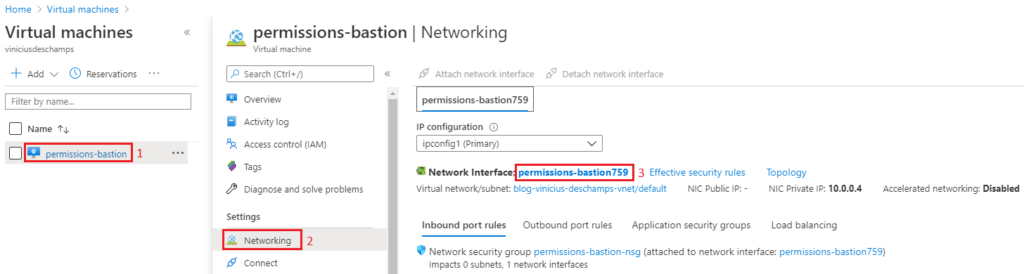
While still on the Virtual Machine (1), click on Networking (2), then on its Network interface (3)
On the Network interface blade, click Access control (IAM) (1), Add (2) and finally Add role assignment (3)
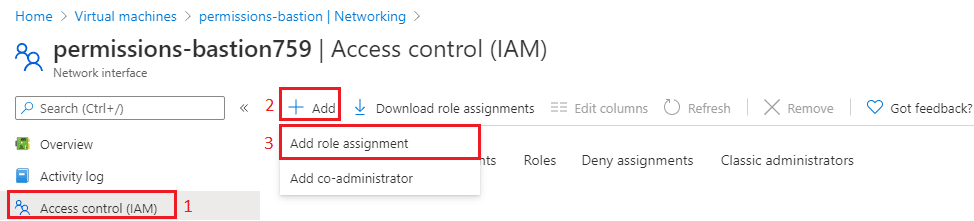
You will see the following blade opened in your window, Add role assignment, please fill accordingly Role (1) choose Reader, type the name of the user you want to grant access in Select (2) field, and select it (3)
Once you select it, check the Selected members has the expected users and hit Save
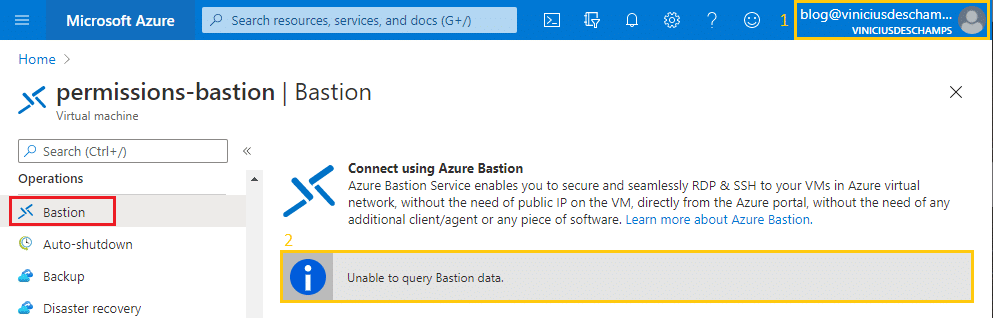
And if you try to connect right away with Azure Bastion, that’s how the screen will look; note that there is now a message Unable to query Bastion data
Azure Bastion resource
Go to Azure Bastions in Azure Portal, and click on it (1), Access control (IAM) (2), Add (3), then Add role assignment (4)

You will see the following blade opened in your window, Add role assignment, please fill accordingly Role (1) choose Reader, type the name of the user you want to grant access in Select (2) field, and select it (3)
Once you select it, check the Selected members has the expected users and hit Save
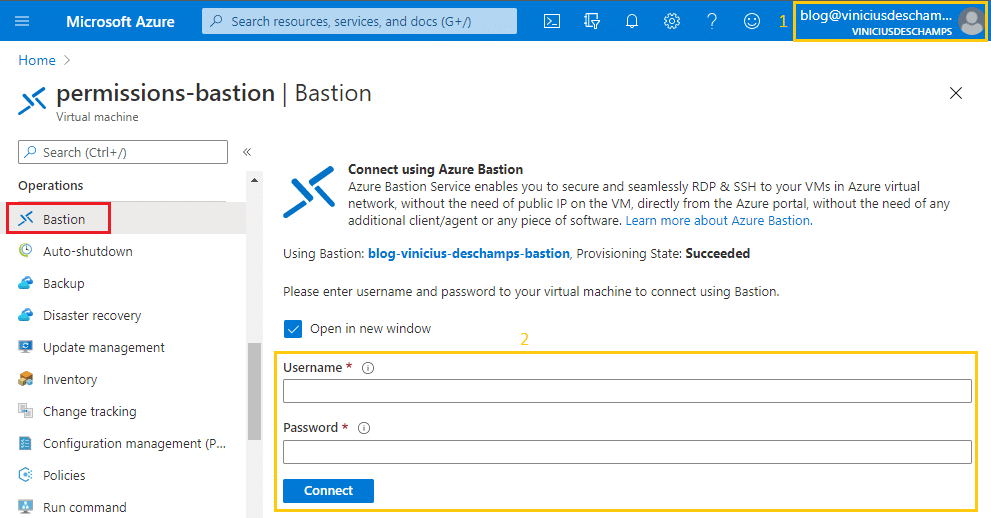
And, voila! You are now seeing Username, Password and Connect
And that’s it
I hope you liked it, and I’ll see you on my next post
Photo by Clarissa Watson on Unsplash