Azure · Database · Segurança · Web App
Managed Identity – Access SQL Database with App Service
With Azure Managed Identity you can eliminate the need for developers to manage passwords and credentials, keeping communication secure between services. If you still don’t know what Azure Managed Identity is, check out this article here
In today’s article, I’ll show a practical example of how to access a SQL database with App Service using Managed Identity
Practical example
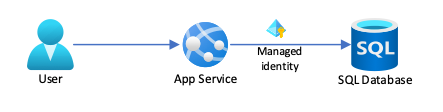
Using the image above as an example, assuming you already have an App Service and an Azure SQL Database, and you want to communicate between them through Managed Identity
Prerequisites
- Azure SQL Server must be configured to accept authentication with Microsoft Entra
- It does not have to be only Entra ID; it can be in SQL mode and Entra
- Associate a Managed Identity to your App Service
- Grant permissions on SQL to the Managed Identity
Associate a Managed Identity to the App Service
You can do this either via the Azure Portal or the command line
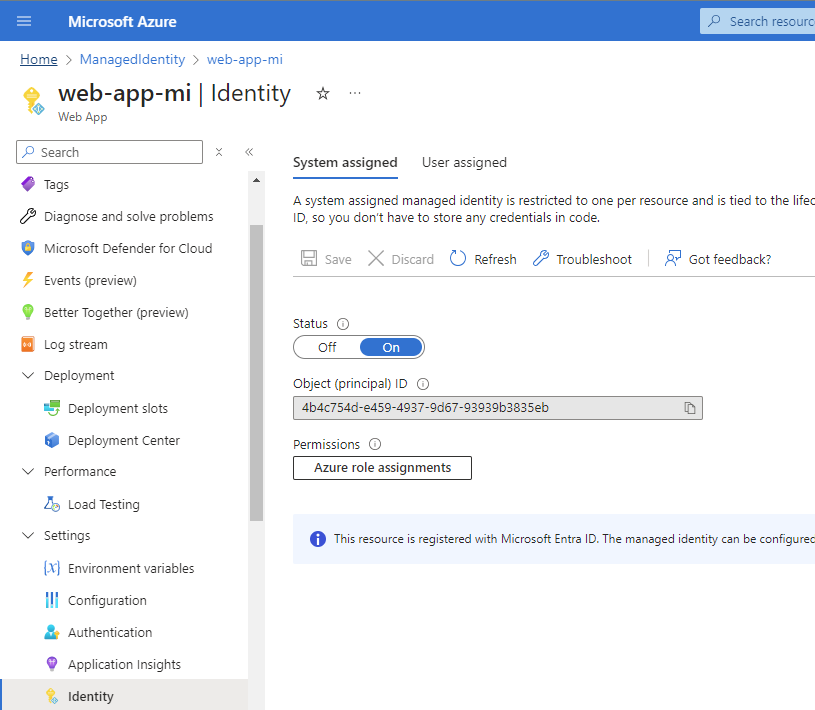
System Assigned
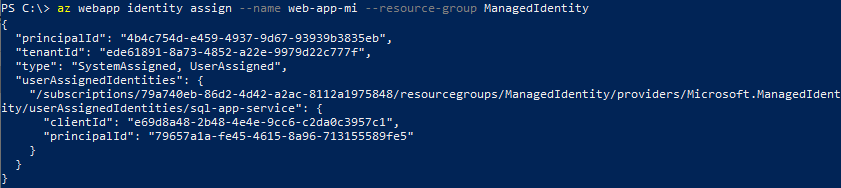
To create a Managed Identity of type System Assigned, run the following command
az webapp identity assign --name Meu-Web-App --resource-group Meu-Resource-Group
User Assigned
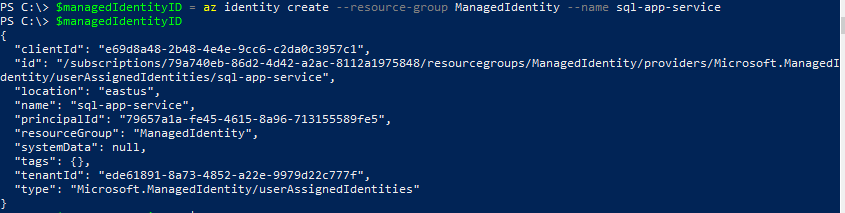
To create a Managed Identity of type User Assigned, you first need to create the Managed Identity
$managedIdentity = az identity create --resource-group Meu-Resource-Group --name Managed-Identity-Name
Then associate it with the App Service
az webapp identity assign --resource-group Meu-Resource-Group --name Meu-Web-App --identities ($managedIdentity | ConvertFrom-Json).id
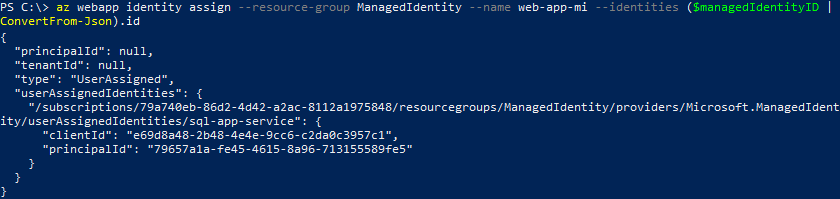
Grant permissions on SQL
For this communication to be established, the App Service must have access to the Azure SQL Database via a Managed Identity, so you need to connect to the Azure SQL Server using an Entra account that has privileges to create users (preferably an admin) and run the following command in the Database where you want to grant access via Managed Identity
Connect in SQL Management Studio
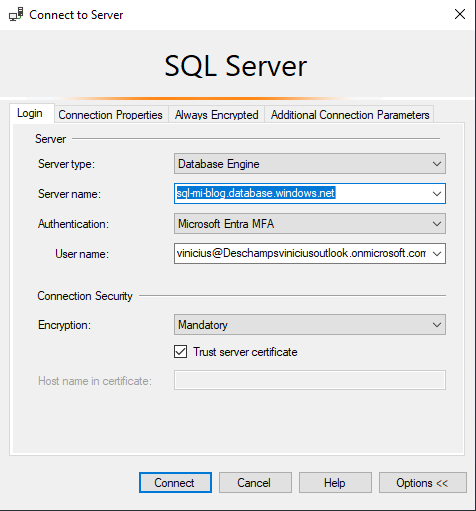
Open SQL Management Studio, specify the server and choose authentication as Microsoft Entra MFA, because since July/2024 Microsoft requires Azure users to have MFA configured, so this is the option you need to use to allow authentication
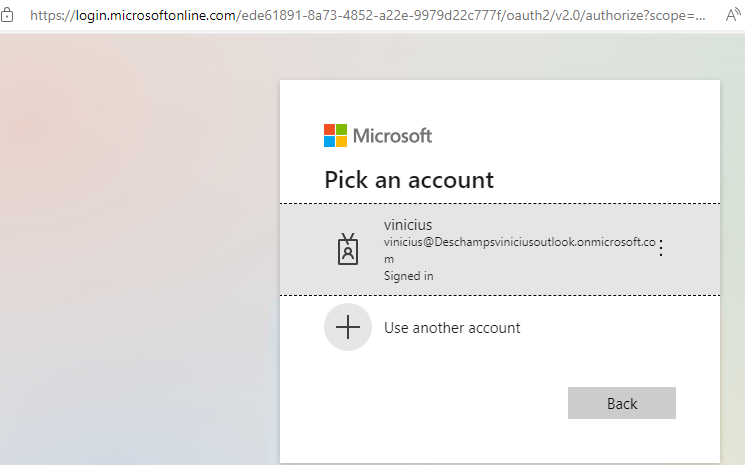
Your default browser will open, prompting you to log in to your account and perform the authentication process using MFA
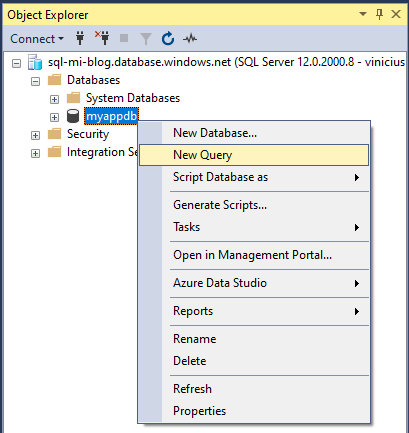
Once connected, go to the database where you want to create the user for the Managed Identity, right-click and New Query
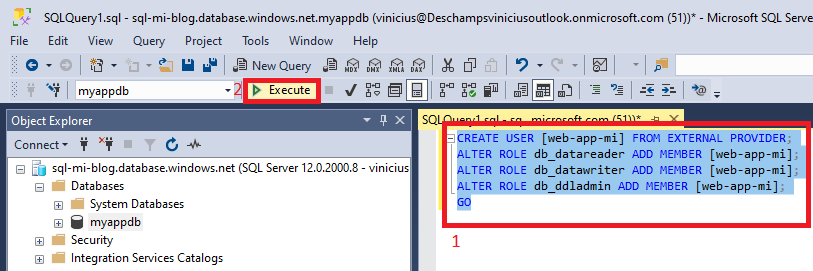
Then run the command below, replacing with the name of the Managed Identity that is associated with your App Service
If Managed Identity is of type System Assigned, the name will always be the App Service name
CREATE USER [<identity-name>] FROM EXTERNAL PROVIDER;
ALTER ROLE db_datareader ADD MEMBER [<identity-name>];
ALTER ROLE db_datawriter ADD MEMBER [<identity-name>];
ALTER ROLE db_ddladmin ADD MEMBER [<identity-name>];
GO
System Assigned
User Assigned
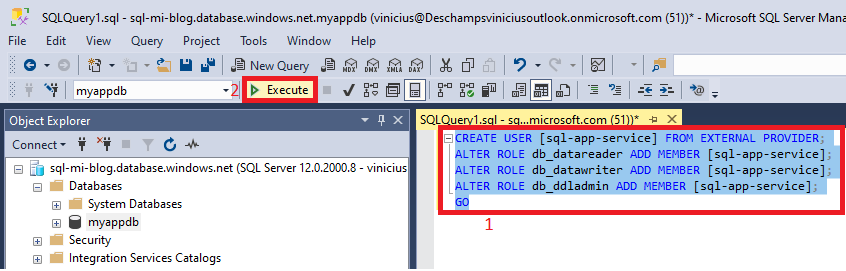
You can use either SQL Server Management Studio or connect via command line and then run the command above
sqlcmd -S <server-name>.database.windows.net -d <db-name> -U <aad-user-name> -P "<aad-password>" -G -l 30
And then run the SQL Query to create the user according to your Managed Identity
Configuring your application
Assuming you use an App Service and an Azure SQL Database and, to communicate, you define a ConnectionString so your application can connect to the database.
For this example, we’re using the following solution, which is available here
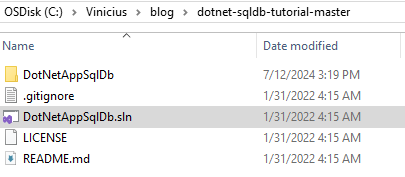
Using Visual Studio, navigate to the project and open the file DotNetAppSqlDb.sln
Prerequisites
- Web App using Azure SQL Database
- For connection via Managed Identity, you will need
- Add the NuGet package Azure.Identity
- Update Entity Framework
- Modify code to establish communication via Managed Identity
Add the NuGet package
Go to Tools, NuGet Package Manager and click on Package Manager Console
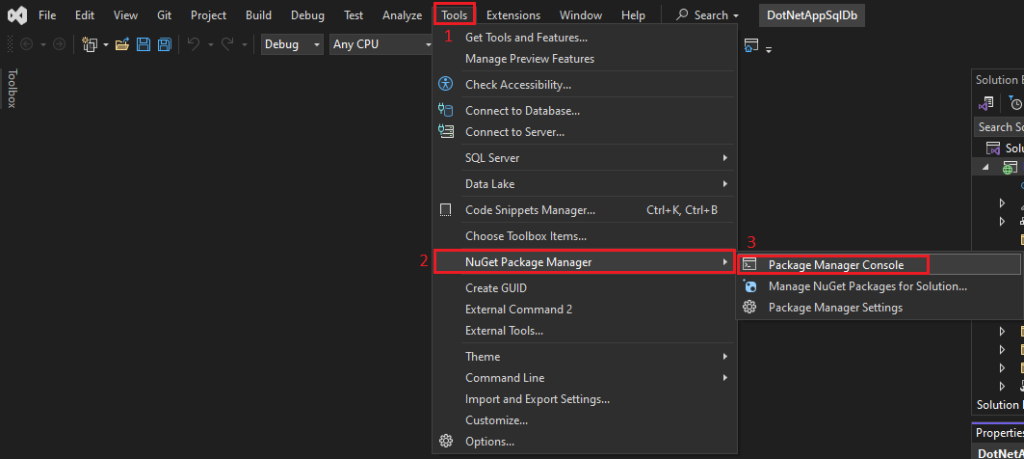
In the console you will type
Install-Package Azure.Identity
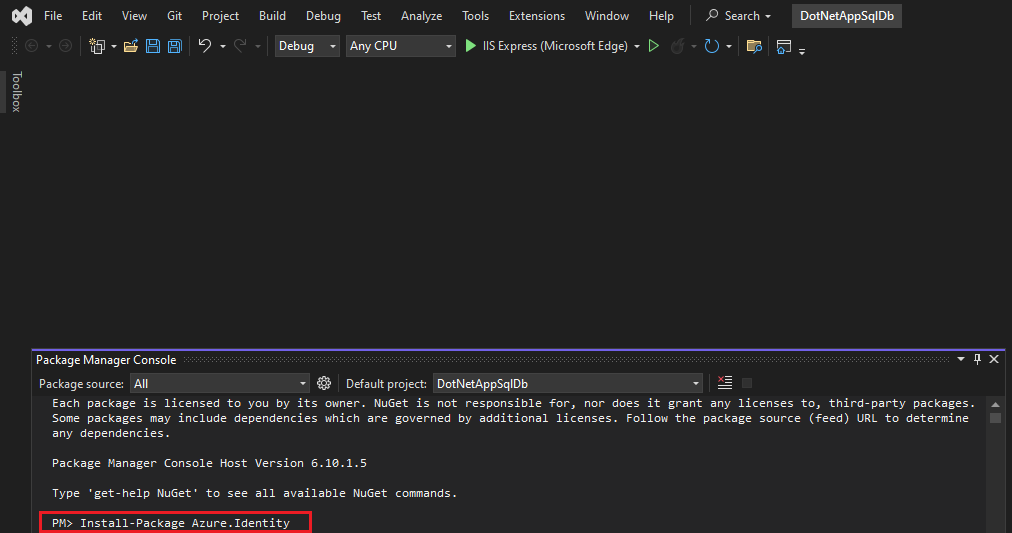
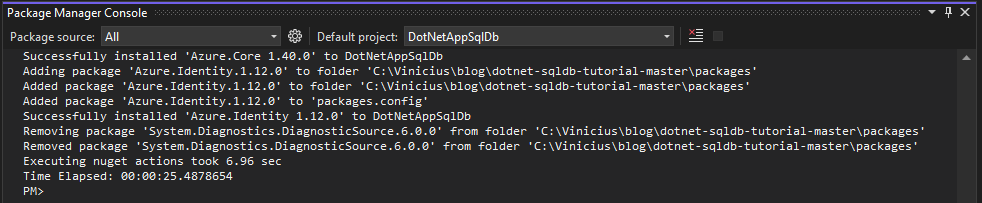
And you should see an output similar to the image below, indicating that the Azure.Identity package was added
Update Entity Framework
Next, in the same console type
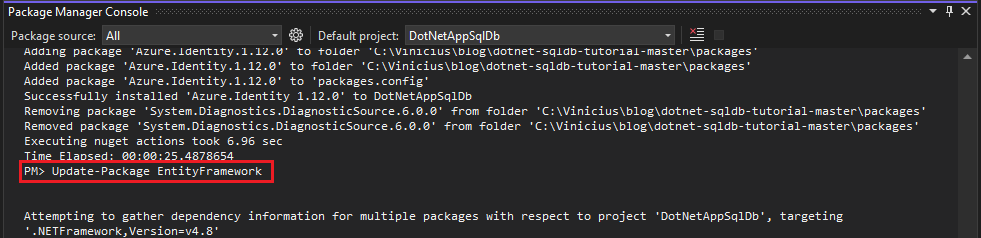
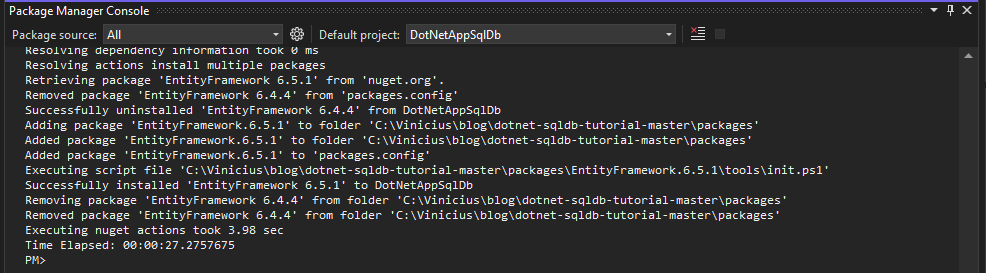
And you should receive an output similar to this image below
Connection Strings
The way you create your ConnectionString may vary depending on the language your application is written in, so we’ll use here ASP.NET, where you would have the following line inside Web.config
...
<connectionStrings>
    <add name="MyDbConnection" connectionString="Data Source=sql-server;Initial Catalog=app-database;User Id=sql-user;Password=sql-password;Encrypt=True;TrustServerCertificate=False;Connection Timeout=30;providerName=System.Data.SqlClient" />
  </connectionStrings>
...
Clearly, this is not the safest way to use it, because anyone with access to the server will have access to secrets in plain text
As mentioned earlier, it would be possible to use Key Vault, but there is still password and credential management to be done, so Managed Identity would be an alternative, where the ConnectionString would change to
...
<connectionStrings>
  <add name="MyDbConnection" connectionString="Data Source=tcp:azure-sql-server.database.windows.net,1433;Initial Catalog=app-database;Encrypt=True;TrustServerCertificate=False;Connection Timeout=30;" providerName="System.Data.SqlClient" /> />
</connectionStrings>
...
Authentication via Managed Identity
And, of course, inside your application you would need to determine that the connection for MyDbConnection will be performed by requesting a token from Entra ID through the code below (Models\MyDatabaseContext.cs)
using System;
using System.Collections.Generic;
using System.Data.Entity;
using System.Linq;
using System.Web;
using System.Configuration;
using Azure.Identity;

namespace DotNetAppSqlDb.Models
{
    public class MyDatabaseContext : DbContext
    {

        public MyDatabaseContext() : base("name=MyDbConnection")
        {
            Azure.Identity.DefaultAzureCredential credential;
            var managedIdentityClientId = ConfigurationManager.AppSettings["ManagedIdentityClientId"];
            if (managedIdentityClientId != null)
            {
                //User-assigned managed identity Client ID is passed in via ManagedIdentityClientId
                var defaultCredentialOptions = new DefaultAzureCredentialOptions { ManagedIdentityClientId = managedIdentityClientId };
                credential = new Azure.Identity.DefaultAzureCredential(defaultCredentialOptions);
            }
            else
            {
                //System-assigned managed identity or logged-in identity of Visual Studio, Visual Studio Code, Azure CLI or Azure PowerShell
                credential = new Azure.Identity.DefaultAzureCredential();
            }
            var conn = (System.Data.SqlClient.SqlConnection)Database.Connection;
            var token = credential.GetToken(new Azure.Core.TokenRequestContext(new[] { "https://database.windows.net/.default" }));
            conn.AccessToken = token.Token;
        }

        public System.Data.Entity.DbSet<DotNetAppSqlDb.Models.Todo> Todoes { get; set; }
    }
}
Remove configured Connection Strings in the App Service
Parameters configured at the resource level App Service > Settings > Environment Variables take precedence over those configured inside your application, for example in Web.config
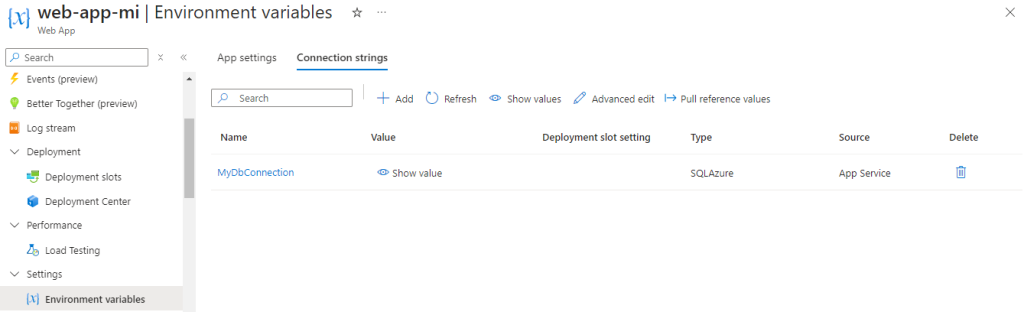
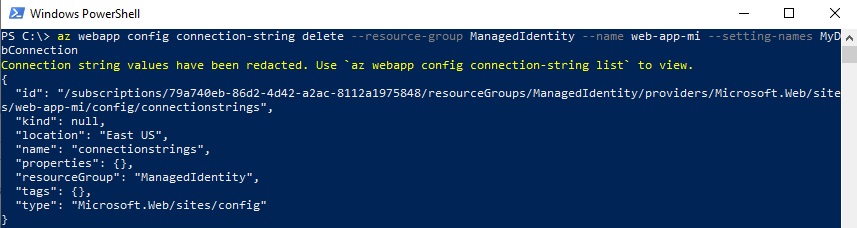
So, to ensure the connection occurs via the Managed Identity, remove this Connection String with the following command
az webapp config connection-string delete --resource-group Meu-Resource-Group --name Meu-Web-App --setting-names Minha-Connection-String
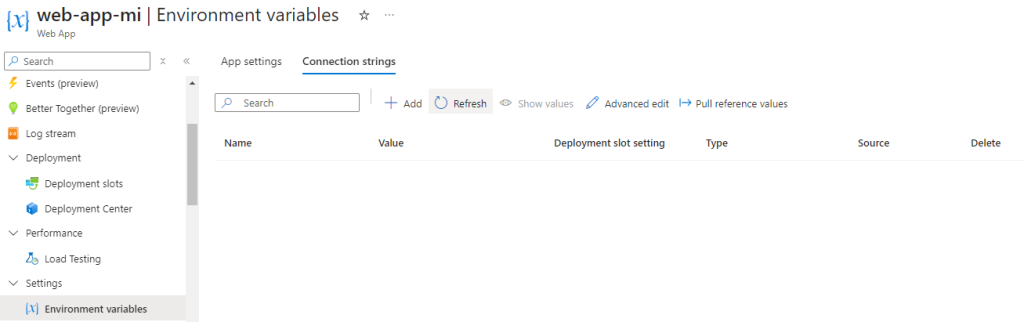
And checking the App Service again, there is no reference; i.e., the Connection String was defined in Web.config and the settings there along with Models\MyDatabaseContext.cs will allow the connection via Managed Identity
Publish your application connecting with Managed Identity
Assuming you already have the publish profile for your application to the Web App in Azure, now with the changes made, we will publish the application through Visual Studio
Select the project in Solution Explorer, then go to Build and click Publish DotNetAppSqlDb
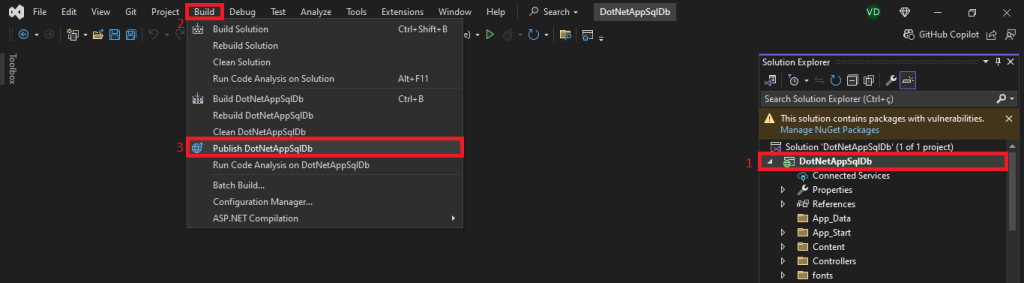
Then the Publish step with the profile will appear in Visual Studio, just click Publish
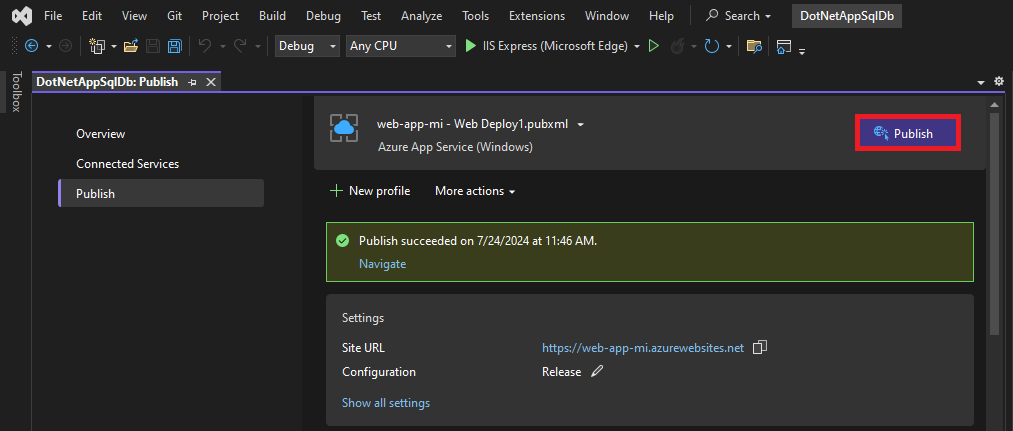
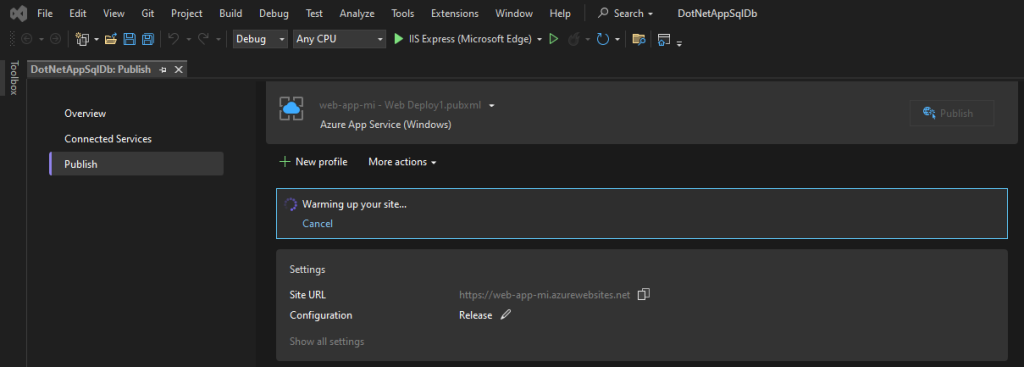
If everything is OK with your build, you should see the message that it is warming up
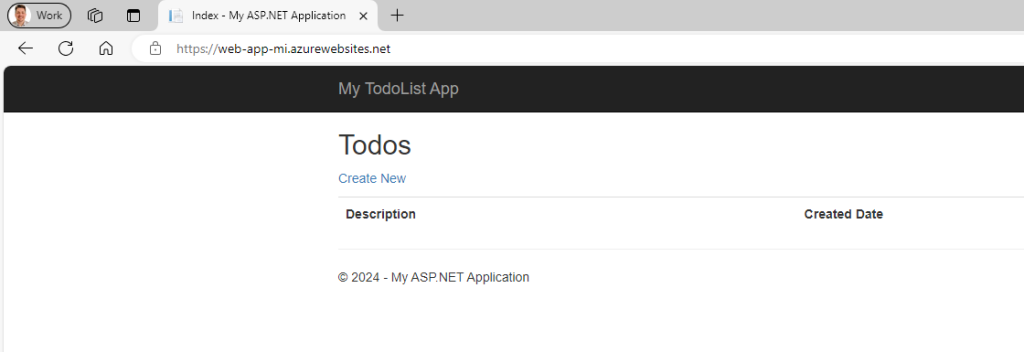
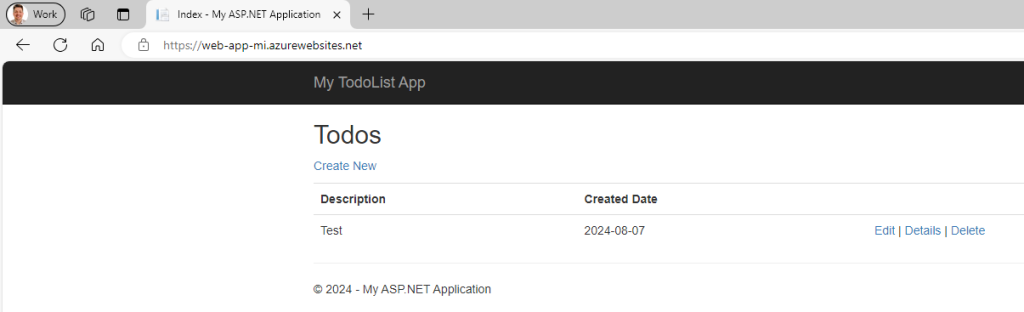
The default browser will open a new tab, and voila, you’ll see your application running (if everything is correct)
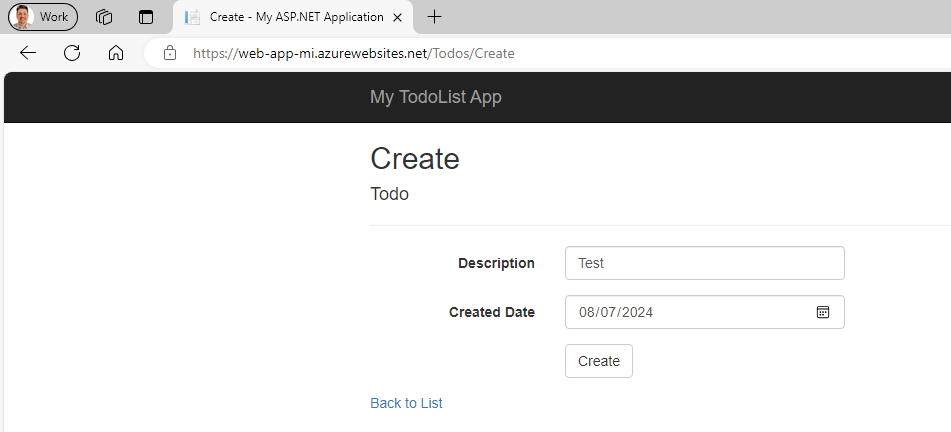
And you can click on Create New, add a description and press Create to verify that the connection and interaction with the database is occurring OK
How to verify that the connection is happening through the Managed Identity?
You need to go to the Entra inside the Azure portal, in the Monitoring section and in Sign-in logs, then choose Managed identity sign-ins
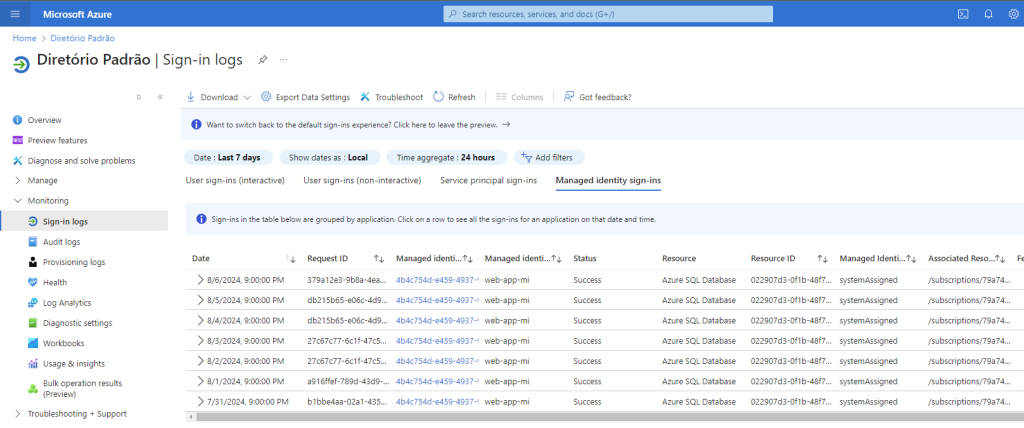
As you can see in the third column, Managed Identity, the ID matches the Identity associated with the App Service that has access to the Azure SQL Database