Azure · Dev Box
What is Azure Dev Box?
Have you ever thought it would be possible to access a portal where you could create a machine in Azure, accessible from anywhere in the world and from any device? This is already possible with Azure Dev Box
What is Dev Box
In short, Dev Box is a pre-configured computer, created through an self-service portal, that provides autonomy to your development team and accelerates the process of onboarding to projects.
Although the documentation itself focuses on developers, Dev Box can be the solution for different scenarios!
Prerequisites
To have DevBox configured in Azure and use it, you need:
- An Azure account with an active subscription
- Be a Contributor or Owner of a Subscription or Resource Group
- Your organization must use the Microsoft Entra ID
- Microsoft Intune for device management
- To use DevBox, each user must be licensed for Windows Enterprise 10 or 11, Microsoft Intune, and Microsoft Entra ID P1
- These licenses are available standalone and are also included in the following licenses:
- Microsoft 365 F3
- Microsoft 365 E3, Microsoft 365 E5
- Microsoft 365 A3, Microsoft 365 A5
- Microsoft 365 Business Premium
- Microsoft 365 Education student benefit
- These licenses are available standalone and are also included in the following licenses:
- If your organization routes outbound traffic through a firewall, the necessary ports must be allowed
Create a Dev Box environment
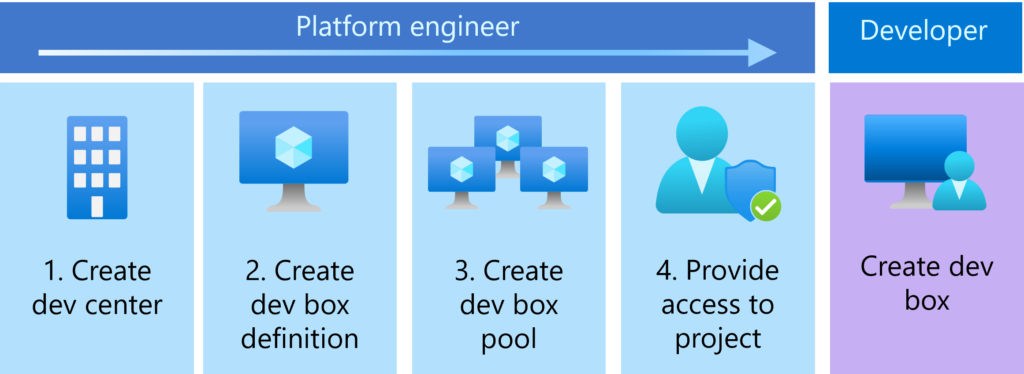
Assuming you meet the prerequisites above, we’ll create the DevBox environment in Azure, and the image below shows the steps needed to configure the Dev Box
Create a Dev Center
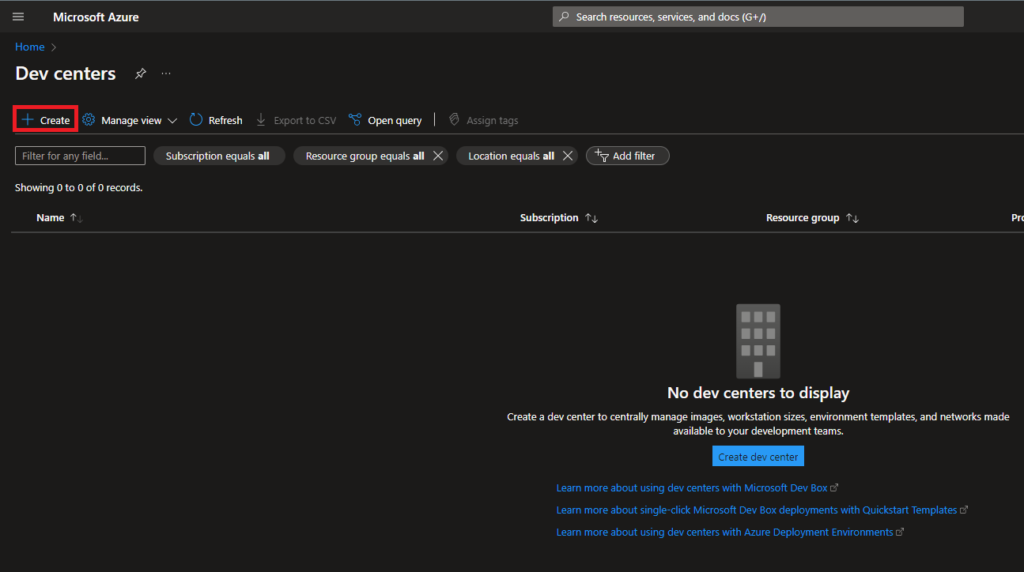
Dev Center is basically centralized management of projects and configurations for your Dev Box, and to create it you need to search in Azure for Dev Center
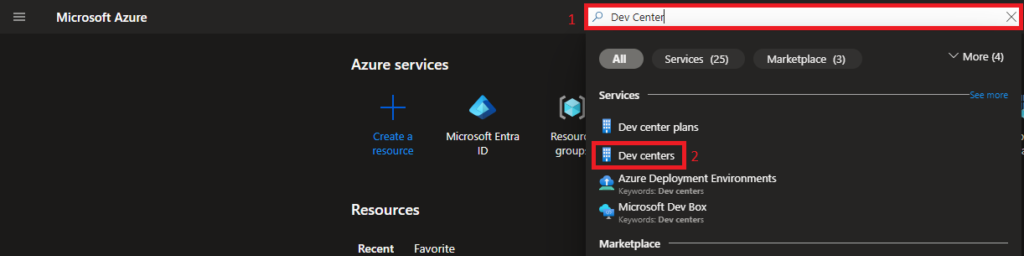
Once in Dev Center, go to Create
You will have to fill in some information, such as Subscription, Resource Group, the name of your Dev Center, and also choose the location, if you want you can configure the Tags, but in the example below I simply chose to create without any identification, just go to Review + Create
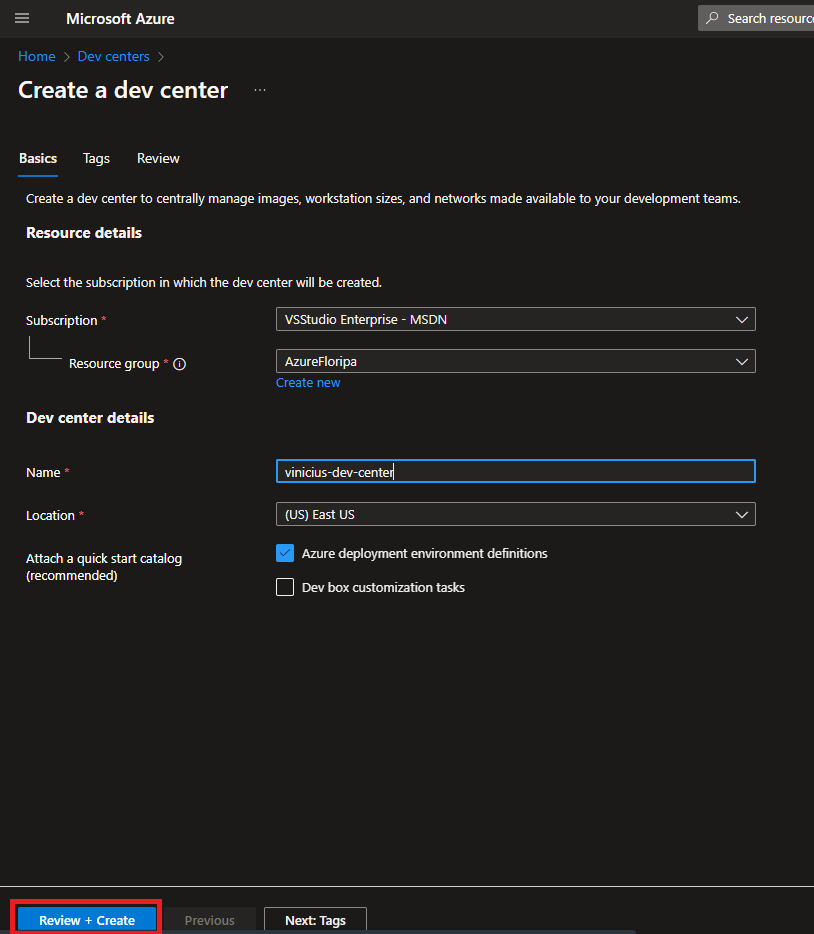
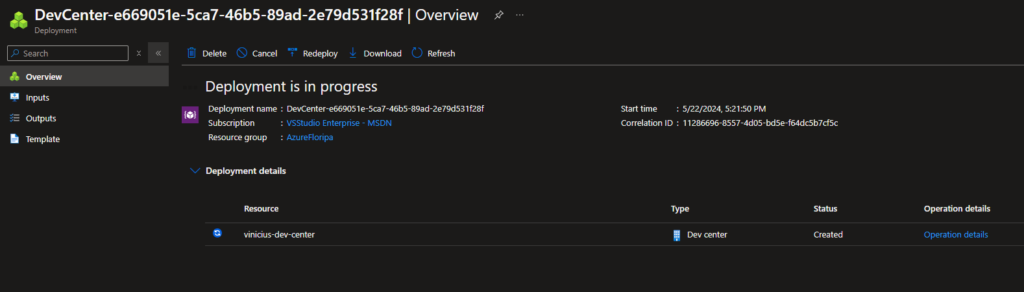
Before creating the Dev Center review the information is correct and click Create, then wait for the resource to be provisioned
Create a project
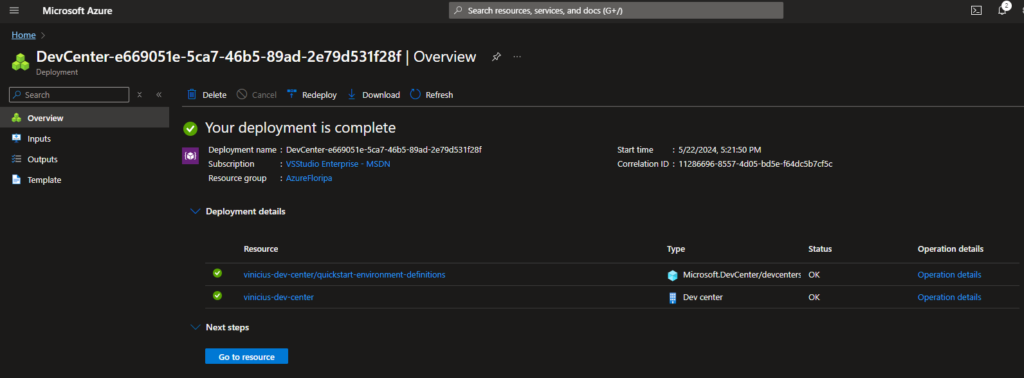
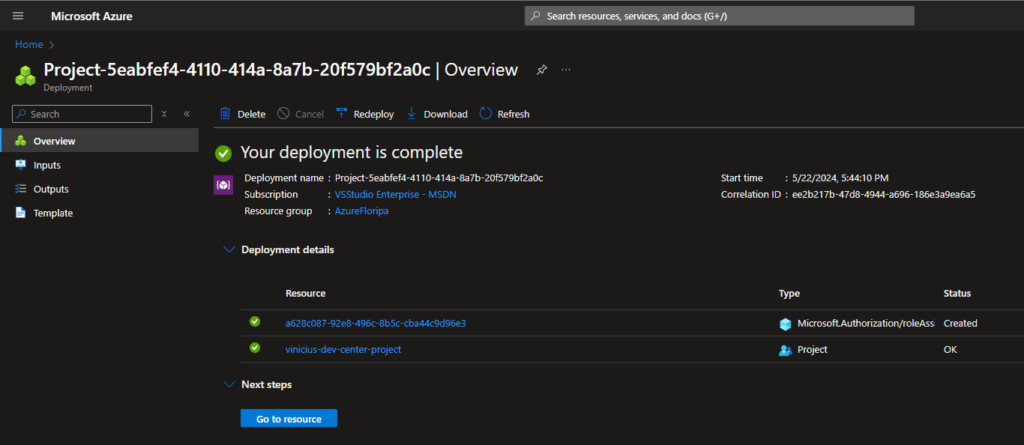
Once the Dev Center is ready, you will see something similar to the image below and you can click on Go to Resource
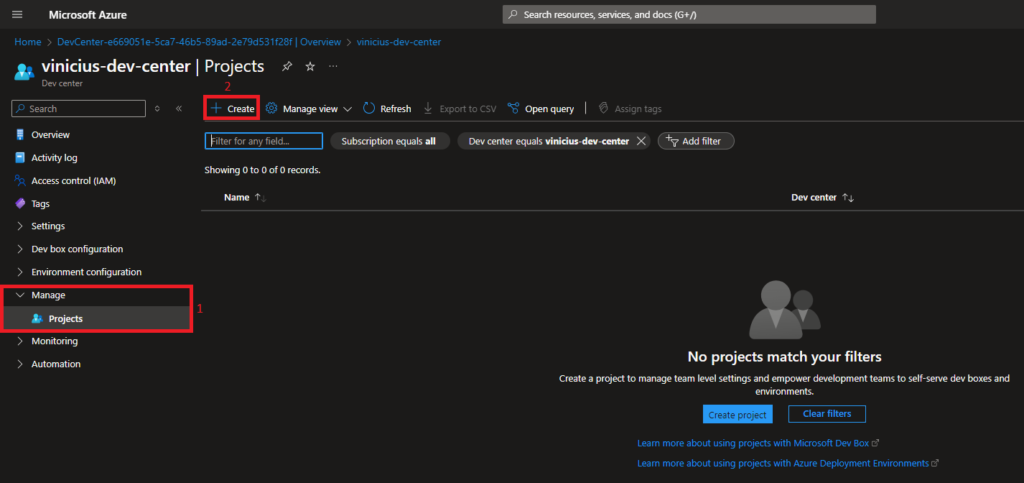
In the left-hand menu, navigate to and expand Manage, Projects, and then on your right Create
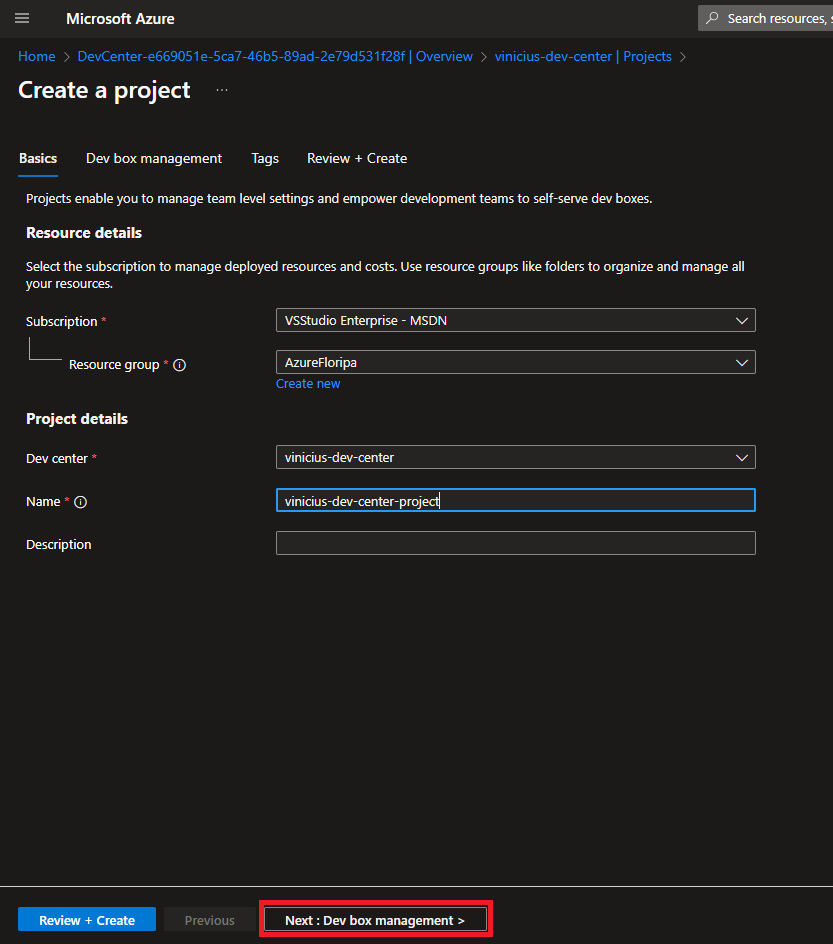
Fill in the information and choose the Dev Center to associate this project with, in my case vinicius-dev-center and then click Next : Dev box management
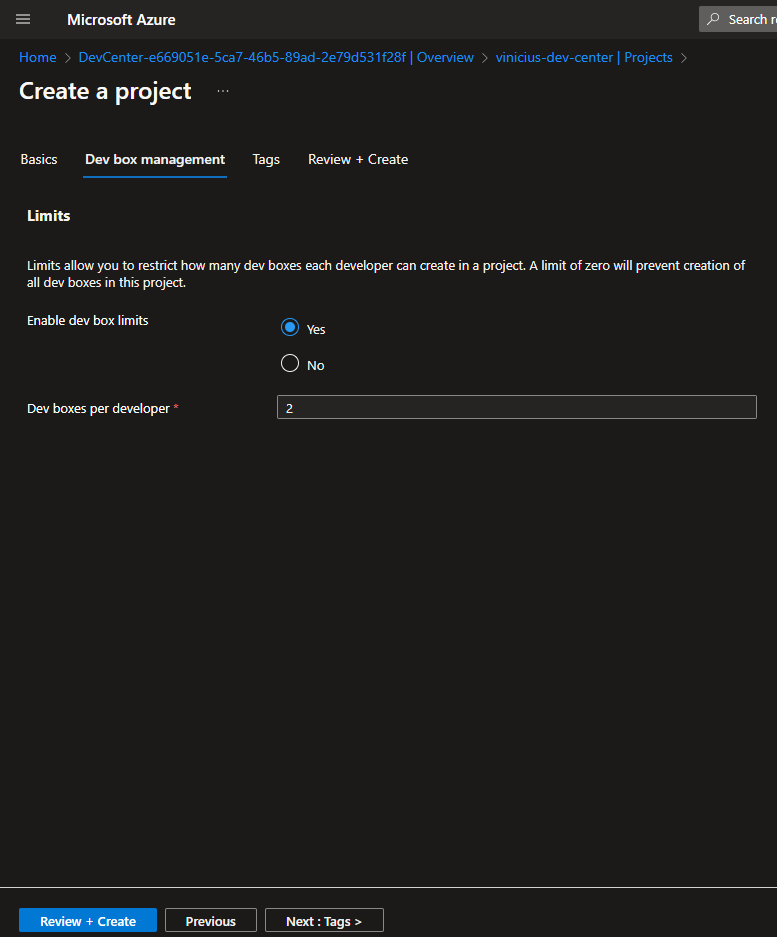
In Dev Box management you can set limits for the number of Dev Boxes a developer/user may create in the project; if you select No it is unlimited, and to set a limit choose Yes and enter a number, noting that this limit is per developer/user
Choose the option that best fits your scenario and go to Review + Create
And, finally, review the information and press Create
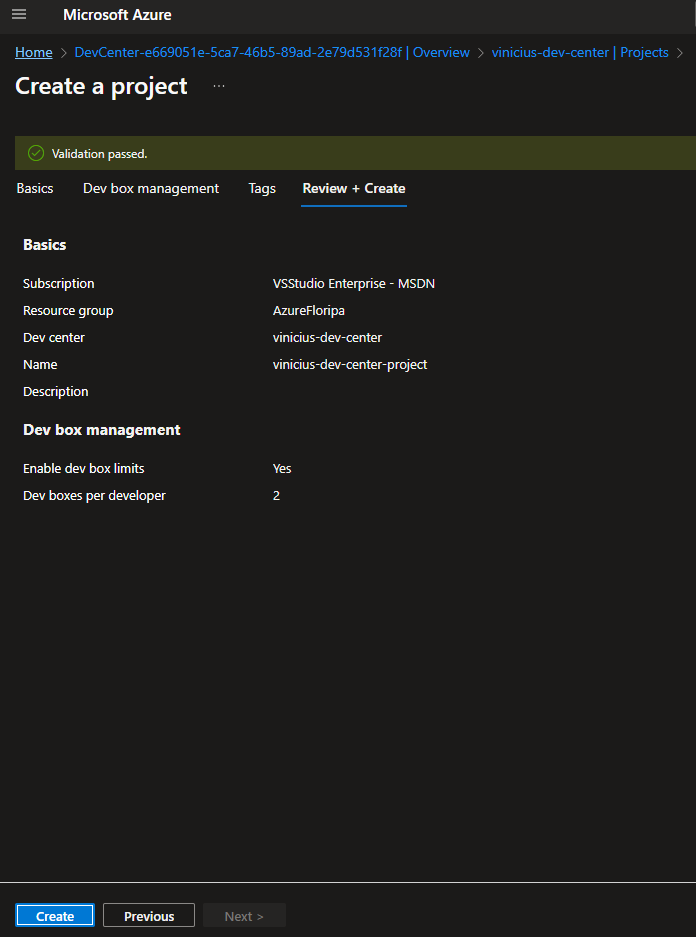
Wait until the project is created, then you can proceed to create the Dev Box definitions
Create the Dev Box definitions
This is where you will configure/define the image(s) and the virtual machine SKU(s) that will be available to be created and used in the Dev Box
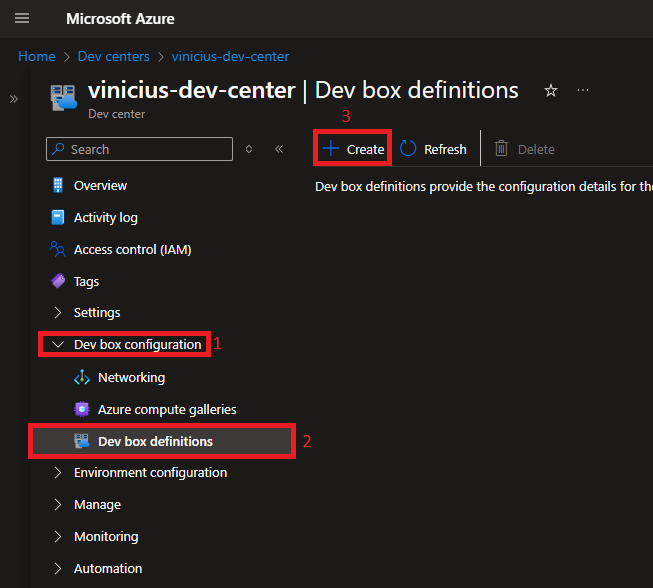
Within the Dev Center you created earlier, expand Dev box configuration, go to Dev box definitions, then click Create
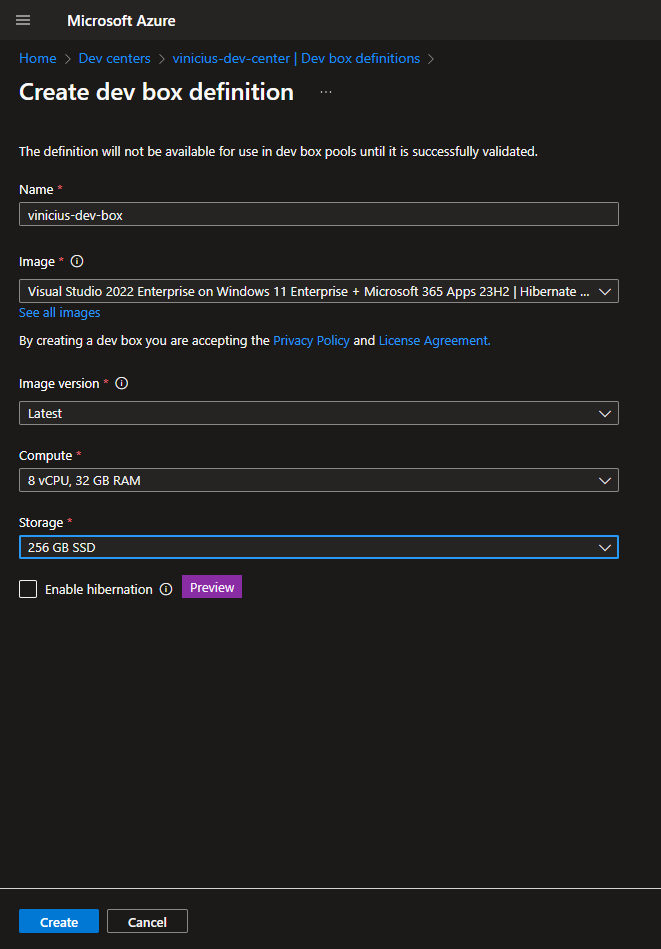
You will need to fill in the information and choose which image to use, as well as the version and, also, CPU, Memory and Storage, and finally click Create
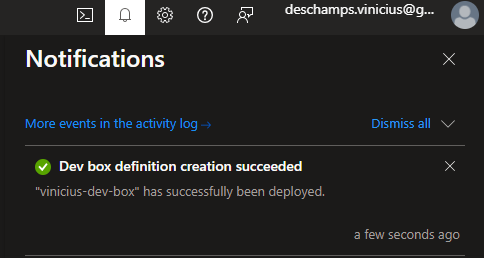
Now just wait for the definitions to be created and finish by creating a Dev Box Pool
Create a Dev Box Pool
The Dev Box Pool is the collection of Dev Boxes that share the same configurations, Dev Box definitions, network connectivity.
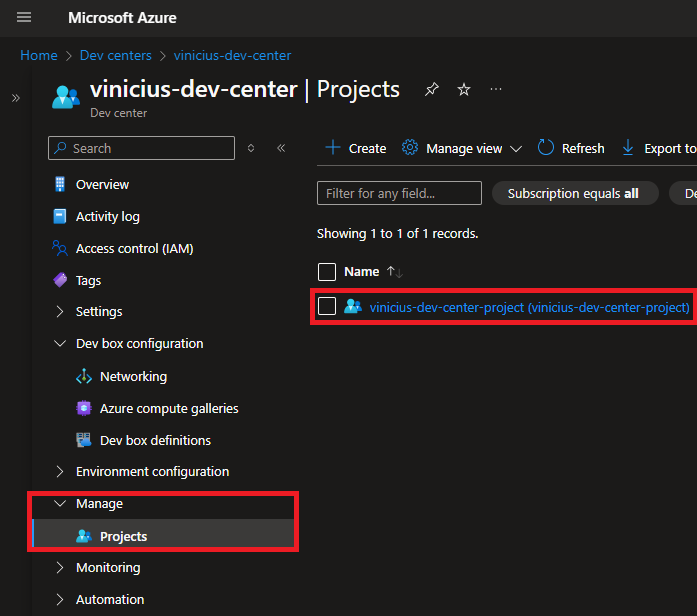
First, you need to go to the Project you created, accessing from within the Dev Center the Manage area and clicking Projects, and the name of the project you created earlier
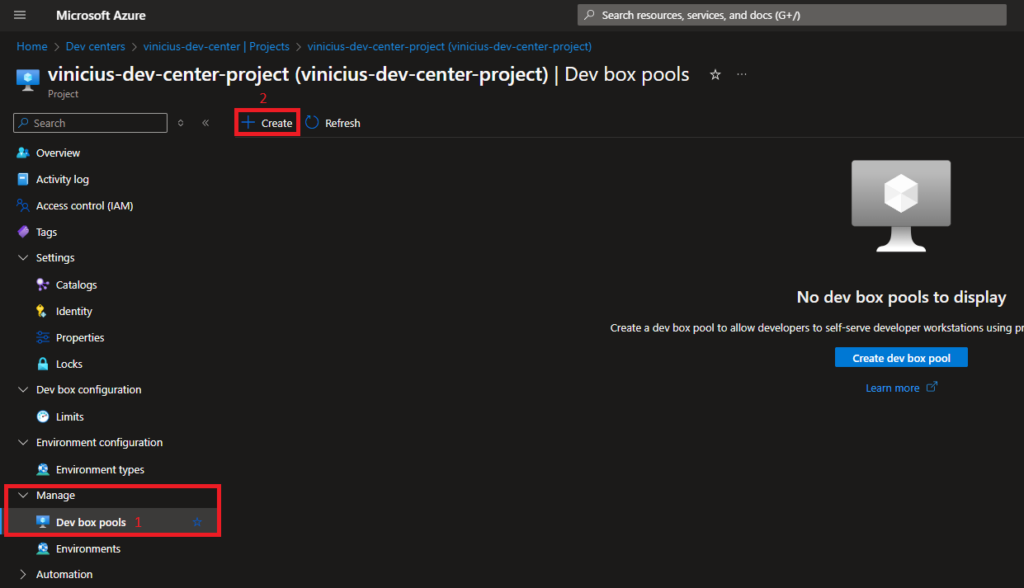
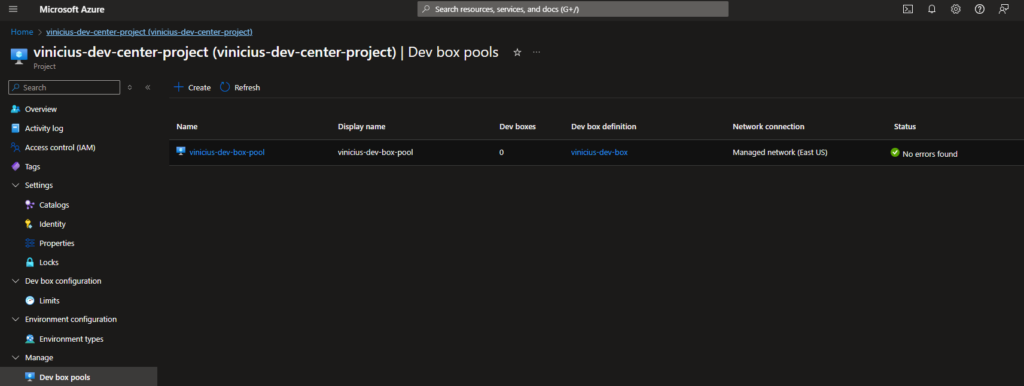
Next, expand the Manage inside the project, click on Dev box pools and Create
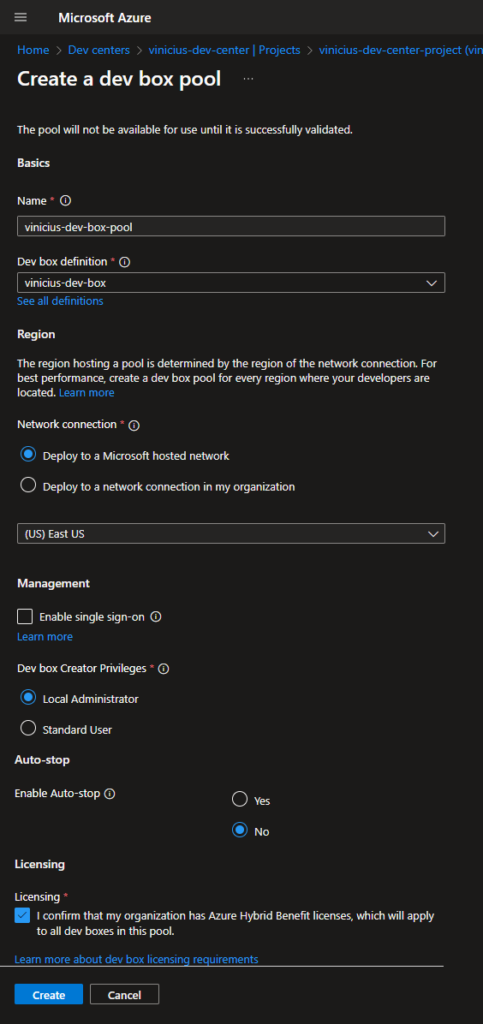
For creating the Dev Box Pool you need to define
- Name of the Dev Box Pool
- Select the Dev Box definition
- Choose how you would like to establish the network connection and region
- Allow or disallow Single Sign-on
- The level of privileges the developer will have when creating a Dev Box
- Enable or disable automatic shutdown
- And confirm that your organization has the benefit to use the Azure Hybrid license
And finally, click Create
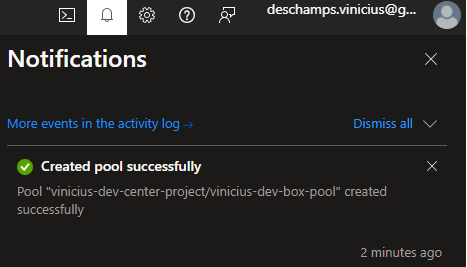
Wait for the notification that everything was created successfully and check the Status of the pool
Create a virtual machine in the Dev Box
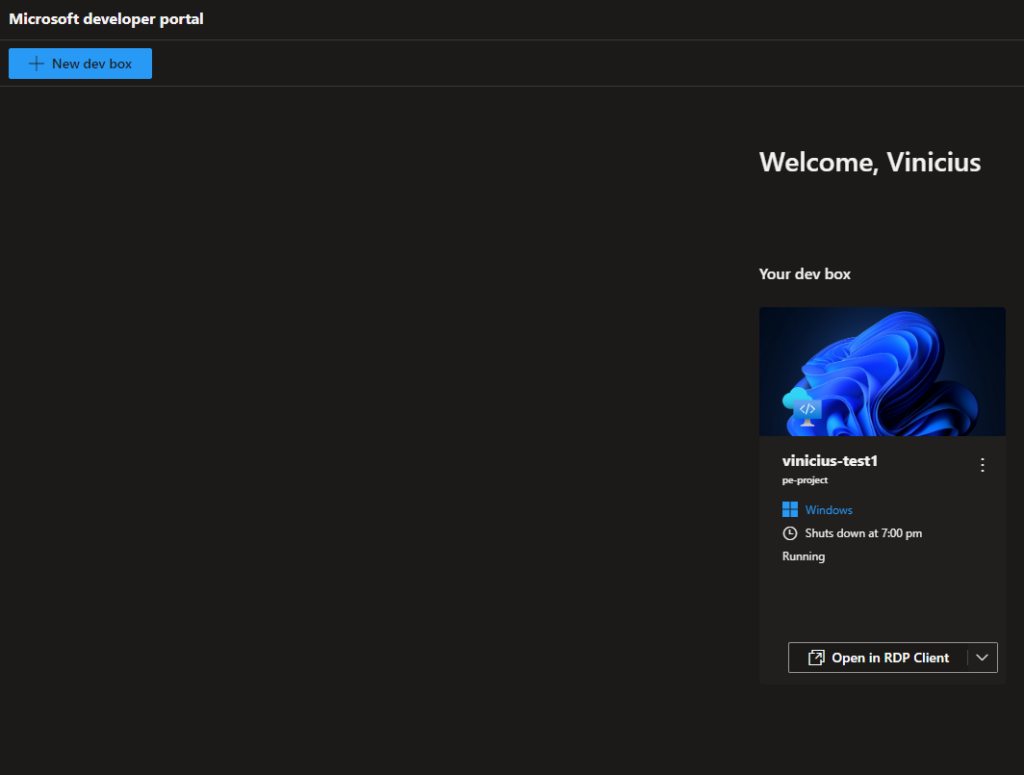
Creation occurs through self-service via the portal at https://devportal.microsoft.com and you need to sign in with your organization credentials
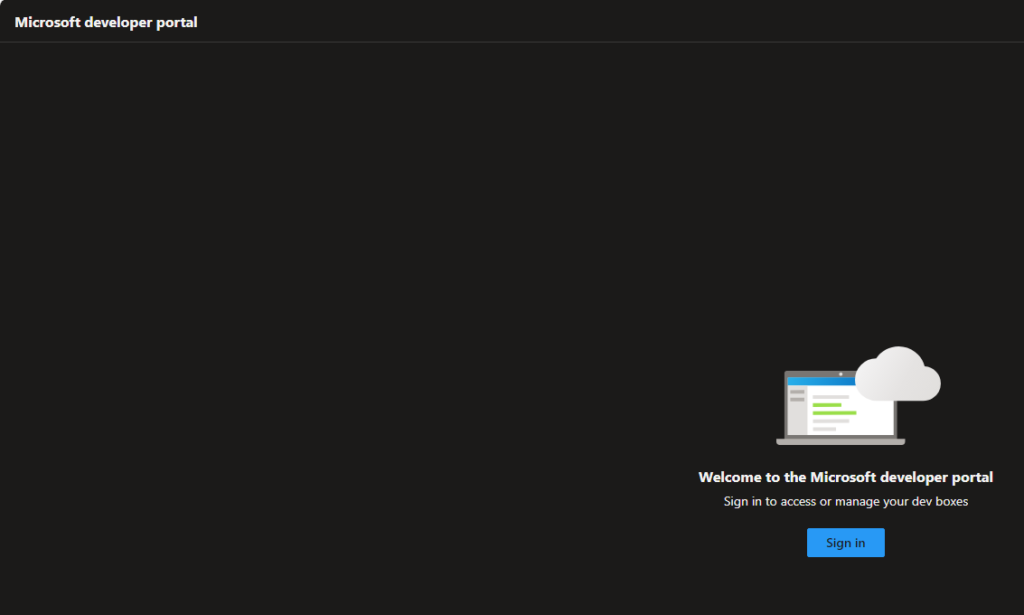
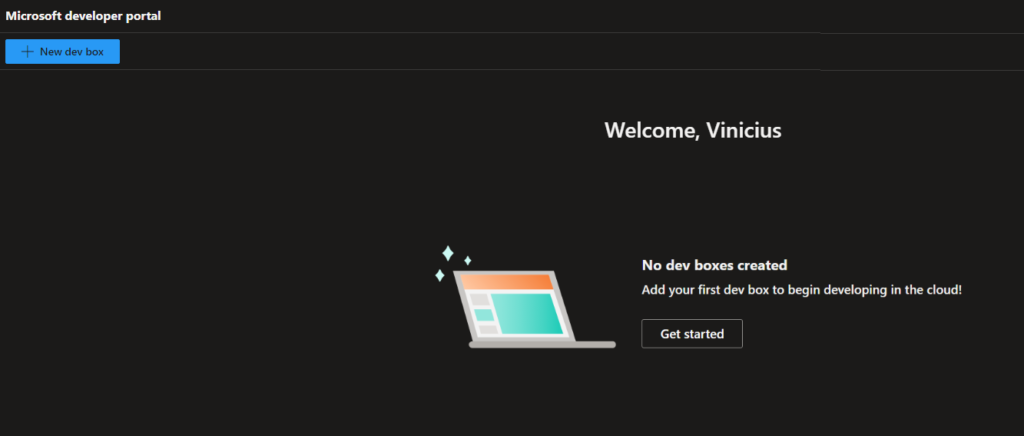
Once connected, you will receive a welcome message stating that there are no Dev Boxes created yet, so I click on Get Started
You will then need to provide the details of your Dev Box
- Name
- Project (in case there is more than one)
- Devbox pool (also if there is more than one)
And finally click Create
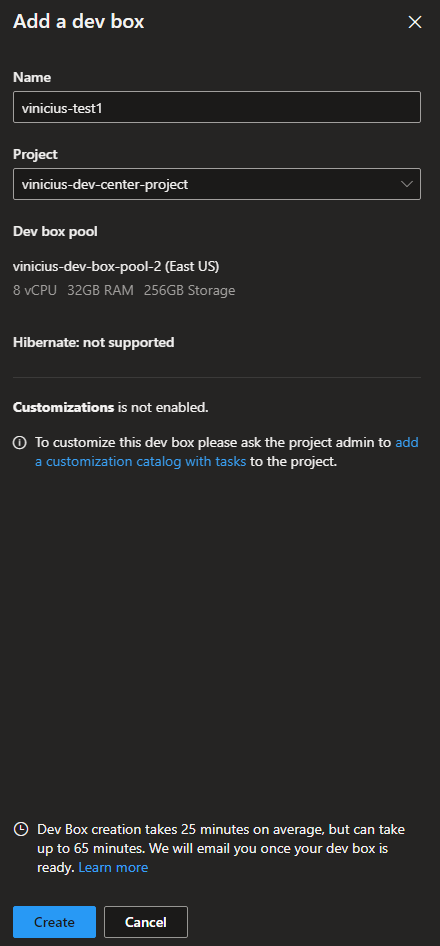
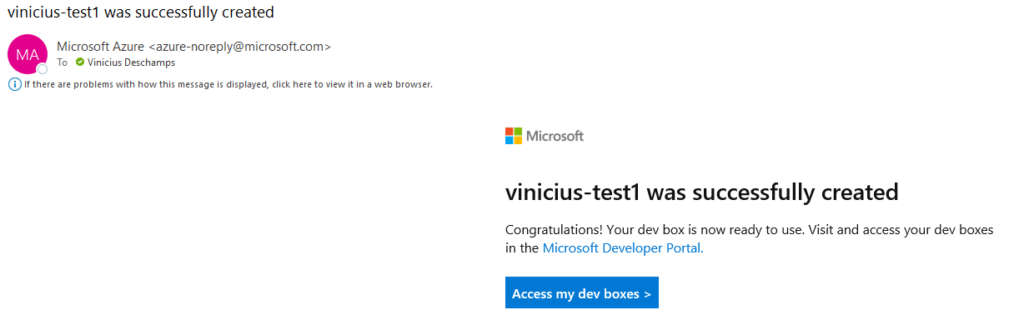
The creation of the Dev Box takes about 45 minutes, even though it mentions 25 minutes on average, and you will receive an email when the Dev Box is ready